What is Invoiced?
Invoiced is a web-based application designed to automate the invoicing process for businesses, offering a range of features to help users create, send and manage invoices efficiently.
Using Nilon Checkout Plug-In, user will be able to complete payment by entering:
- Card Number
- Expiry date
- CVV
The Nilon payment gateway allows you to use an Iframe to embed the payment pages into your website.
Enabling Pay UI:
-
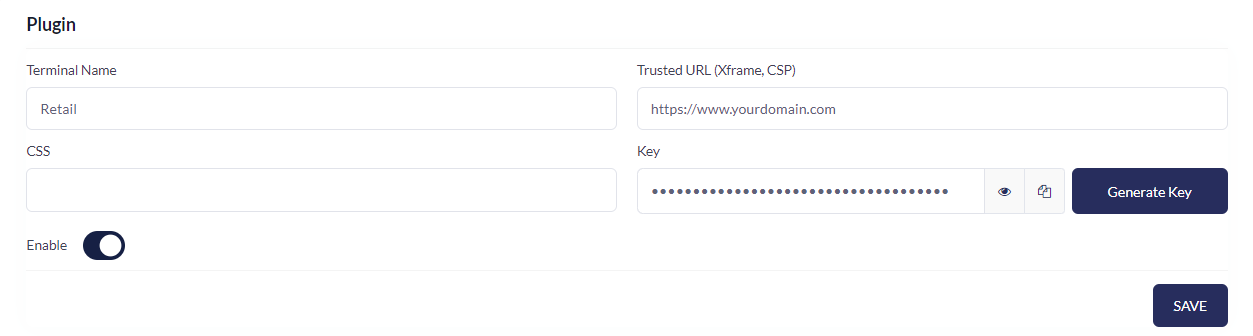
To generate a data key, login to virtual terminal, navigate to Settings -> Plug-In
Virtual Terminal URL - https://demo.nilon.com/account/login
Data Key : The key that will be generated by Nilon, has to be used as authentication key to authenticate the plug-in on your end.
Example Data Key : 0D75E6A9-B83D-00A3-BFAB-1E1488CCE8A2
Trusted URL :URLS’s need to be set in production so that the plug-in can be activated only from the websites it is supposed to be activated (Separate multiple domains with commas).
Example : https://www.yourdomain.com, https://subdomain.yourdomain.com
CSS :Specify the style sheet to be used, this CSS is based on generic Nilon Style sheet. Your styles can be applied by overriding specific parts of the CSS. (Optional)
Embedding Pay UI:
Login to Invoiced App : https://app.sandbox.invoiced.com/login
Navigate to Settings>Customer Portal
Scroll down to 'Advanced Settings'
Click on 'Edit' button against Custom JavaScript
For the API call to happen, Nilon will be providing the data key along with customized Java Script to inject into the existing Java Script in Invoiced.
Configuration Parameters:
Below are the mandatory parameters that must be added to your
| Parameter | Description |
|---|---|
| data-key | he key generated by Nilon to authenticate Plugin |
| data-mode | accepted values: token, payment token: will set the mode of the Pay UI for tokenization only payment: will set the mode of the Pay UI for payment |
| data-display Mode | Accepted values: popup popup: will create a modal popup of the UI in a parent page of your website. |
Optional Parameters:
| Parameter | Description |
|---|---|
| data-firstname | Add parameter to enter First name field on the UI |
| data-lastname | Add parameter to enter Last name field on the UI |
| data-email | Add parameter to enter Email field on the UI |
JavaScript Payment method:
Data-mode is payment in the script tag,
| Parameter | Description |
|---|---|
| PayInvoice (InvoiceNumber) | Invoice number is read from TCG payments and pass to PayInvoice method |
| GetInvoice (JavaScript Method) | Get invoice API to retrieve invoice details. Get invoice details by advanced filter with invoice number. https://developer.invoiced.com/api/#retrieve-an-invoice |
| GetCustomer (JavaScript Method) | Get customer details by customer id |
Production Configuration:
Custom JavaScript, In add Script method
Update the Souce URL (srcTag.src) https://api.niolon.com/PayUI/nilon.min_v4.0.js
Add below URLS in CSP Trusted Sites:
https://portal.onepay.com/
https://app.onepay.com/
https://api.onepay.com/
Demo Configuration:
Custom JavaScript, In addScript method
update the Source url (srcTag.src) https://apidemo.nilon.com/PayUI/nilon.min_v4.0.js
Add below URLS in CSP Trusted Sites:
https://demo.nilon.com/
https://appdemo.nilon.com/
https://apidemo.nilon.com/
An Invoice cannot be generated without creating a User. To generate a New Invoice,
- Navigate to Invoices>New Invoice. Find or create a new customer and fill all the required to generate invoice.
- Click on 'Save and Issue'. A pop-up displays with options to send Invoice via E-mail, Letter and Text Message.
- An Invoice link is sent to the subscriber.
Invoice Payment Flow:
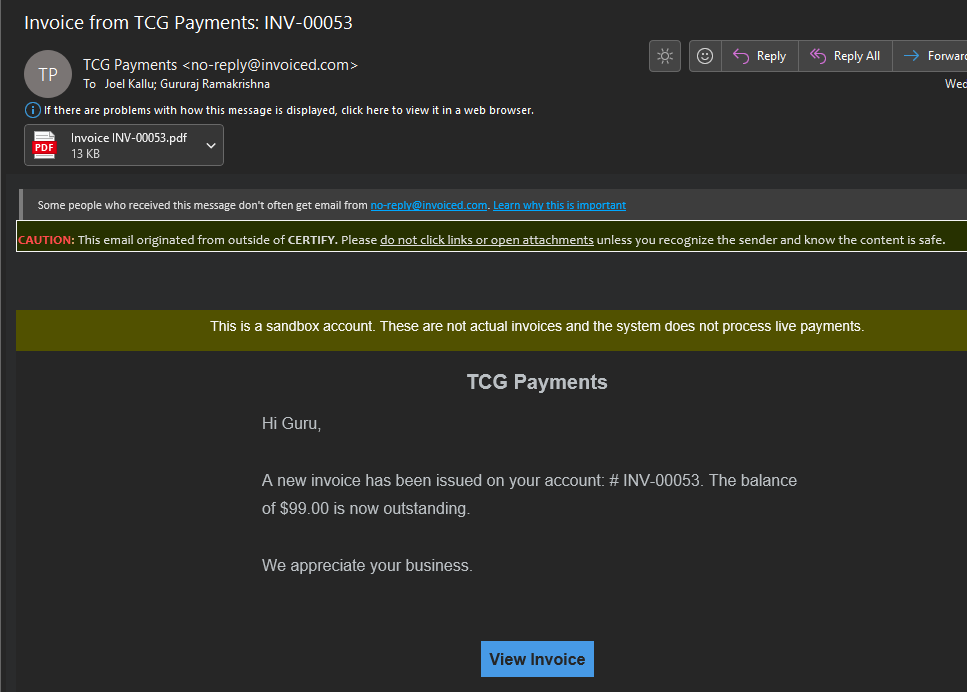
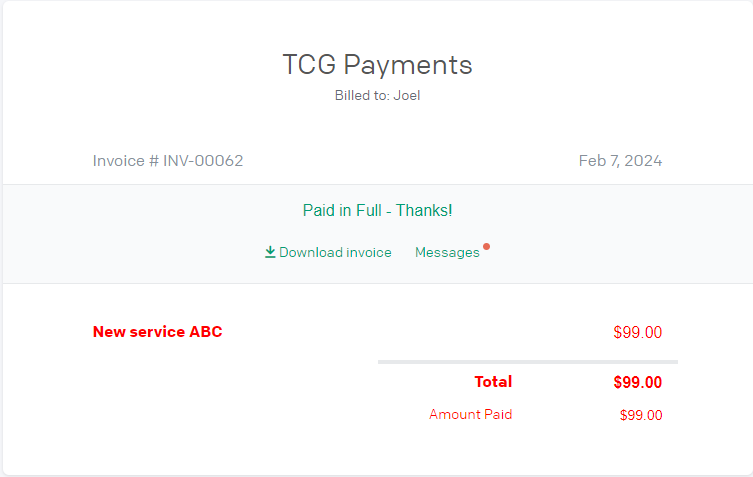
An Invoice is sent to the e-mail. Click on View Invoice to view details of all the charges on the invoice.
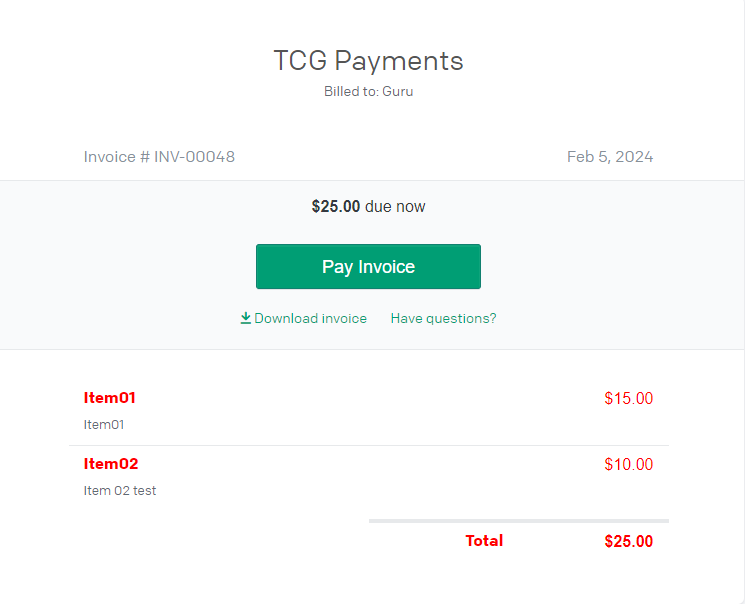
It redirects to official payment page.
Click on Pay Invoice.
Nilon plugin then pops up with (E-mail ID, First Name and Invoice ID)

(a) Click on Proceed to Pay and enter the card details (default)
(b) Click on Proceed to Pay and select ACH (driven from OMS enablement)
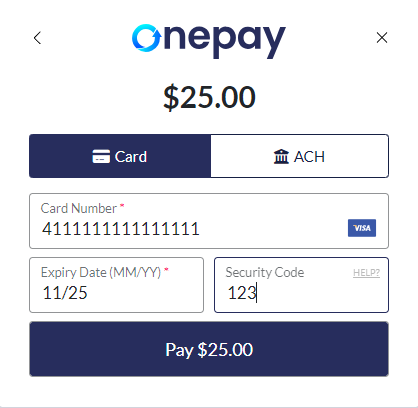
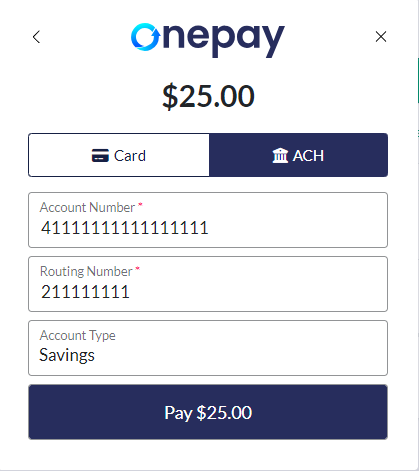
Click on 'Pay' which confirms the payment and the payment is approved. Pay UI popup disappears, and the status changed to Paid in Full - Thanks!
Conditions:
- For a Successful Transaction - Insert payment approval status to TCG invoice using Post payment API
- For Failed/Error - Add payment in TCG invoice, it Voids the transaction.
- For Declined Transaction - Plugin pop up displays with the validation message.
Transactions Reporting:
Login to Virtual Terminal - https://demo.nilon.com/account/login
Navigate to Reporting> Transactions to view the list of transactions and their statuses.